INDIGO Sky
RaspberryPI image with a pre-configured INDIGO server.
RaspberryPI image with a pre-configured INDIGO server.
INDIGO Sky is a free Raspbian based image customized for running INDIGO easily and seamlessly on a Raspberry Pi.
We provide 32 and 64-bit OS images. The images work with Raspberry Pi generations:
Download the appropriate image with INDIGO 3 for Raspberry Pi 3, 4 and 5 (based on Debian 12 Bookworm) New:
Download the appropriate image with INDIGO 2 for Raspberry Pi 3, 4 and 5 (based on Debian 12 Bookworm) Partially supported:
INDIGO Sky access point has the following default credentials:
SSID: indigosky
password: indigosky
INDIGO Sky can be configured via the web GUI running at http://indigosky.local:7624. However this URL may not work on Windows, in this case please use http://192.168.235.1:7624. If the device is connected via Ethernet cable to your home network, you must use the IP address assigned by your router and the same port as above to access the web GUI.
NOTE for Microsoft Edge users: Some people reported reconnects every 30s when using Microsoft Edge browser. The issue is in the websockets implementation in Edge, and there is nothing we can do about that. The only solution is to use another browser like Chromium, Chrome, Safari, Firefox etc.
If you want to boot INDIGO Sky from USB please see the instructions here.
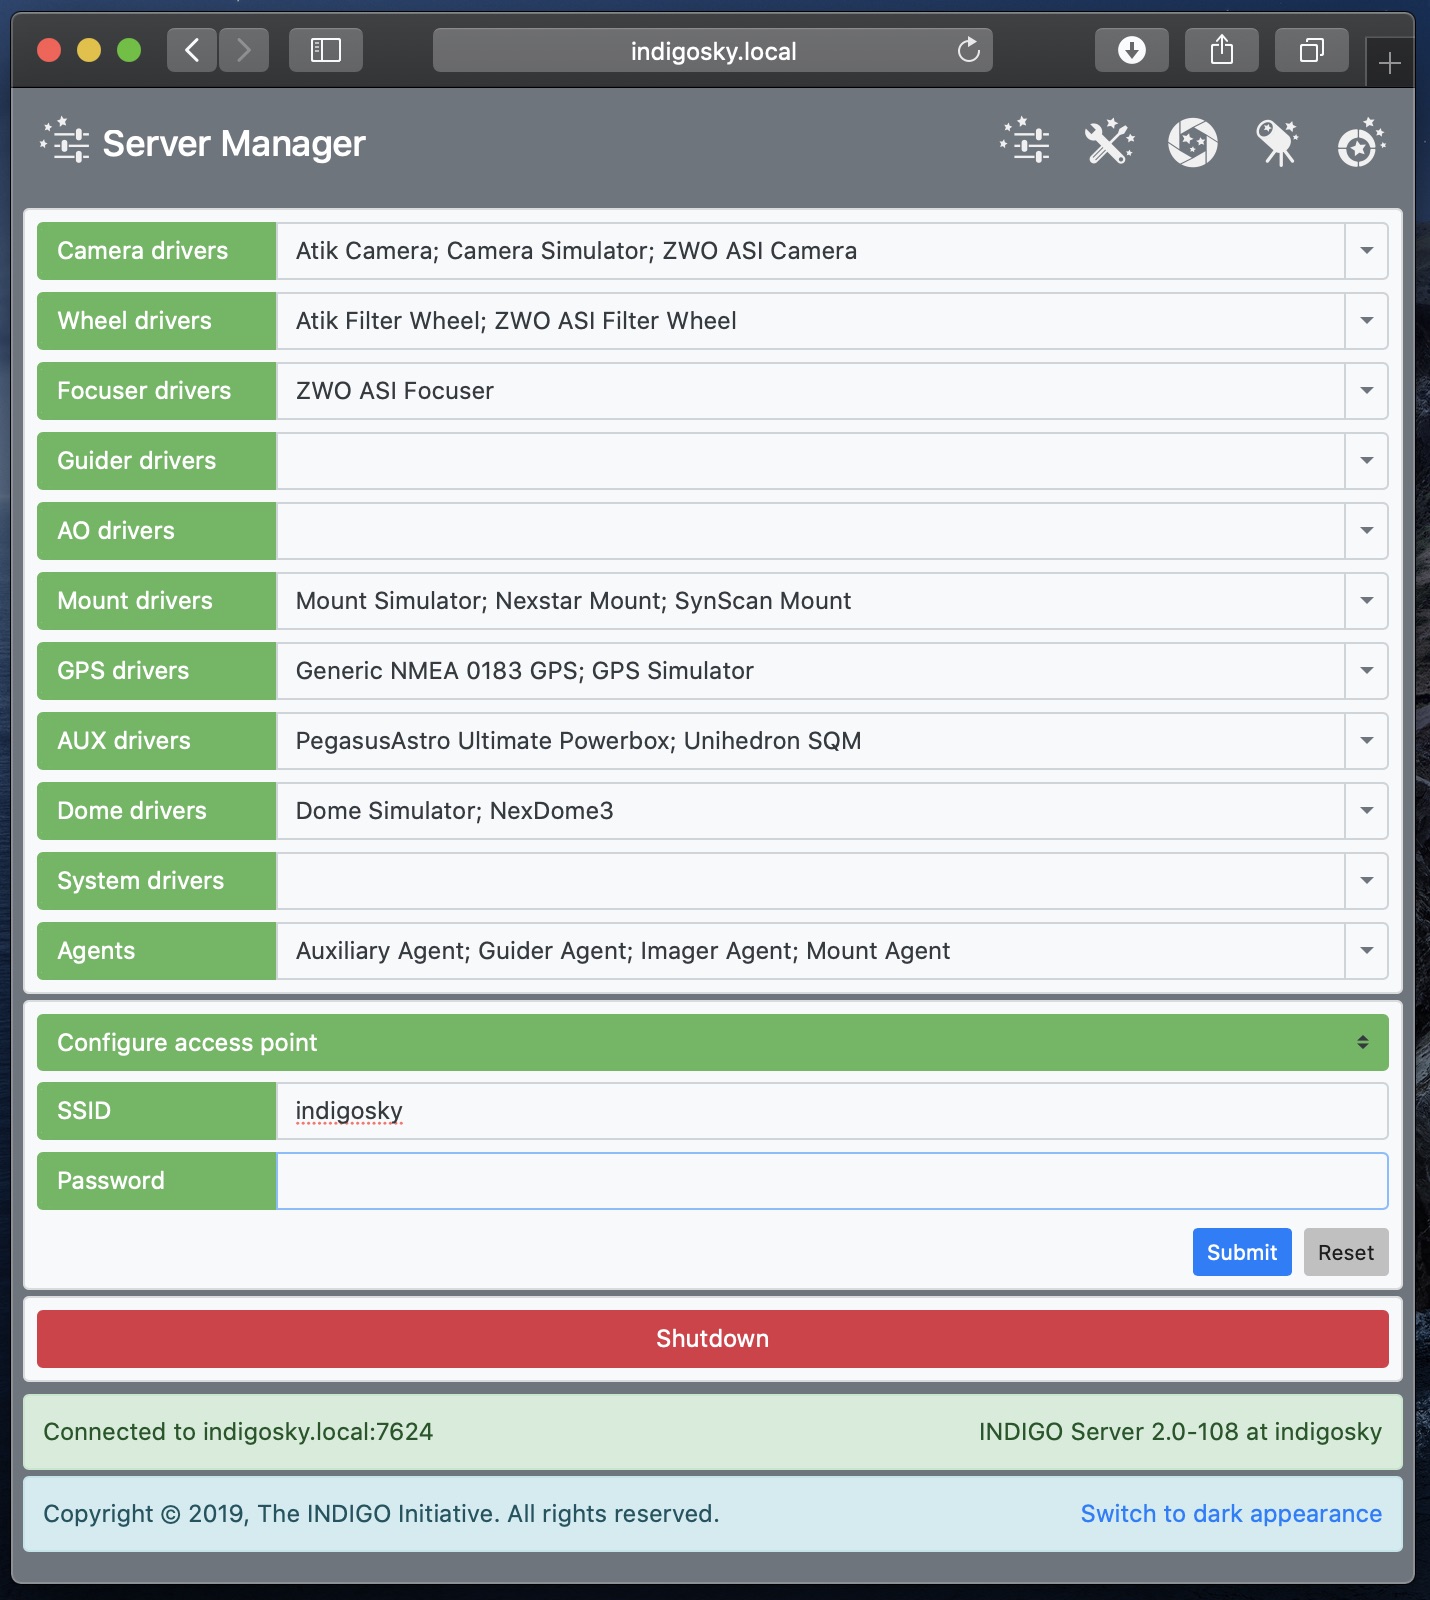
It is strongly recommended to change the password. Open your browser and visit web GUI to open the INDIGO web manager.

Select "Configure access point" and enter a the network name and the password. Then click on the "Submit" button. If the operation cannot be committed, e.g. due to a too short password, you should see an alert. In this case start over and if everything is fine, wait for reboot with the new WiFi configuration.
Supported WiFi channels:
INDIGO Sky can also be configured for connecting to an infrastructure access point.
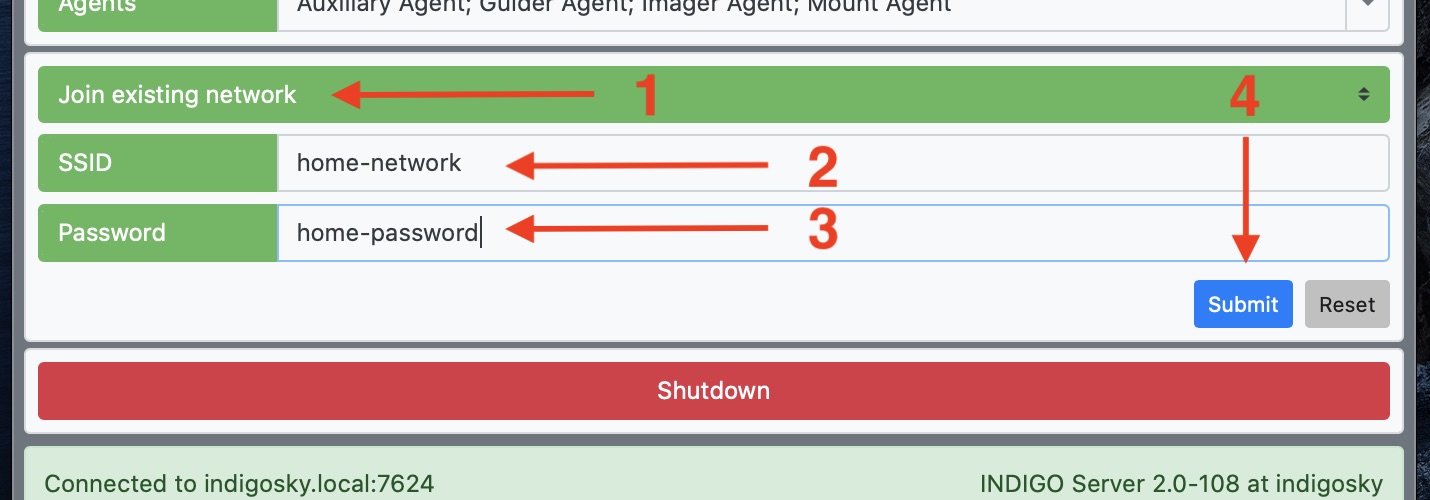
Select "Join existing network" and enter the network name and the password. Once done, click on the "Submit" button and wait for reboot with the new WiFi configuration. If you entered values incorrectly and INDIGO Sky cannot connect to the infrastructure access point, then connect via ethernet cable to INDIGO Sky and update the credentials.
INDIGO Sky can share Internet connection avalable on one of its interfaces. For example, if the Wi-Fi interface is configured in Access Point (AP) mode, and the Ethernet interface is connected to a local network with Internet access, this Internet access can be shared with the devices connected to the INDIGO Sky AP.

To enable or disable Internet sharing, set "Server->Main->Internet Sharing" to "Enabled" or "Disabled" respectively.
NOTE: Use this fearure with care and enable Internet sharing only after changing the default Indigo AP password.
INDIGO Sky allows to downgrade or upgrade INDIGO versions easily.
Whenever INDIGO Sky is started, the Internet connection is checked and new update package index files are fetched from the INDIGO package server.
A working Internet connection is also required for upgrading or downgrading INDIGO package version. If you want to upgrade or downgrade to a certain version, click on the chosen INDIGO version, e.g. 2.0-79. Wait until INDIGO Sky downloads and installs the package. If installation is successful, the INDIGO Sky will reboot afterwards automatically.

INDIGO Sky timezone is UTC. This timezone is suitable for precise astronomical calculations and representations of timestamps in FITS data.
If INDIGO Sky is started and no Internet connection is available, the previously saved date and time is used prevent the clock from being reset. That won't advance time while the device is off, so it will lag behind. To overcome this problem, the time and date of INDIGO client running in webbrowser is used as reference and set on INDIGO Sky when connected. If Internet connection is available, then the time and date information is received from Internet time servers. The time and date of INDIGO client is still used as the reference for INDIGO Sky.
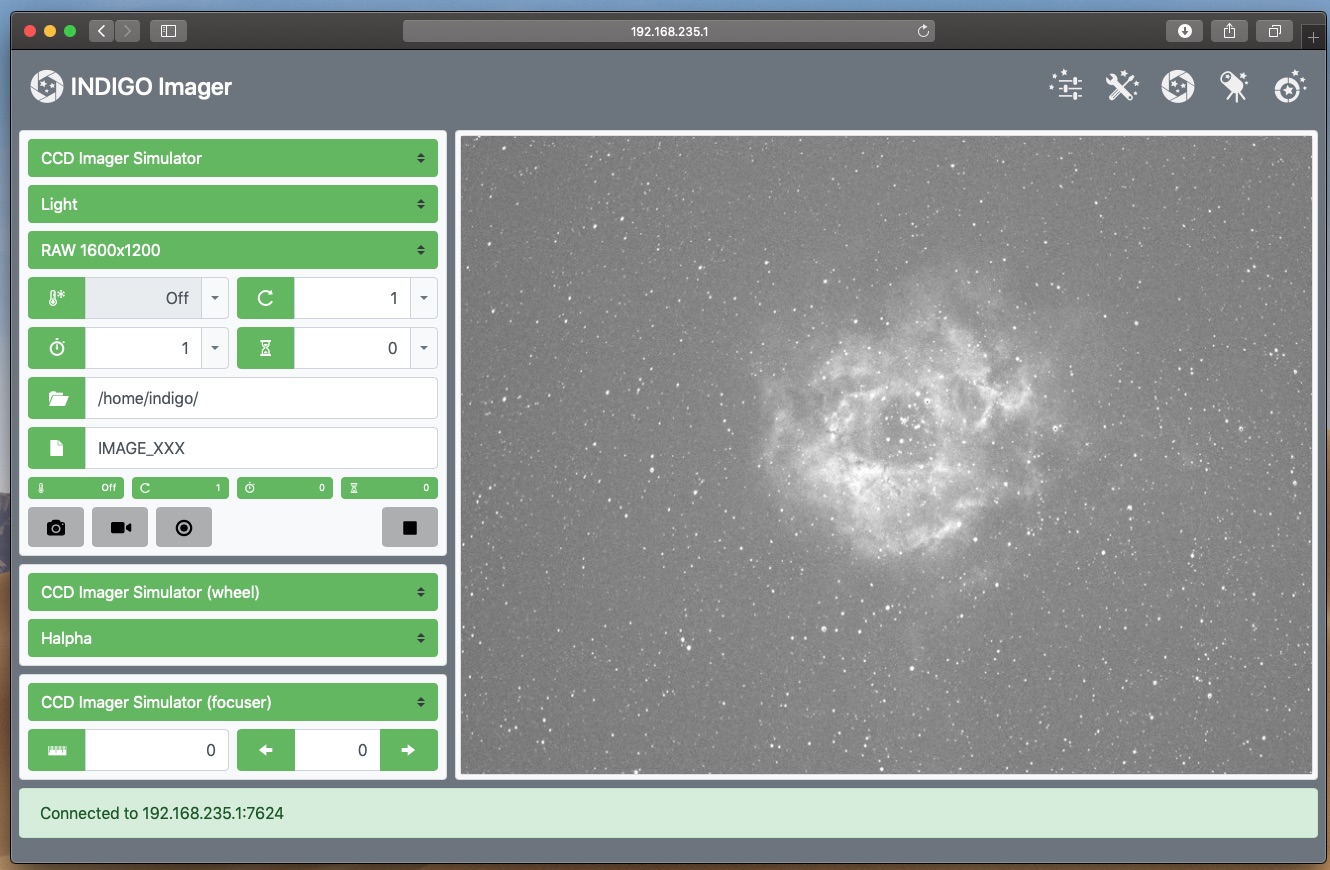
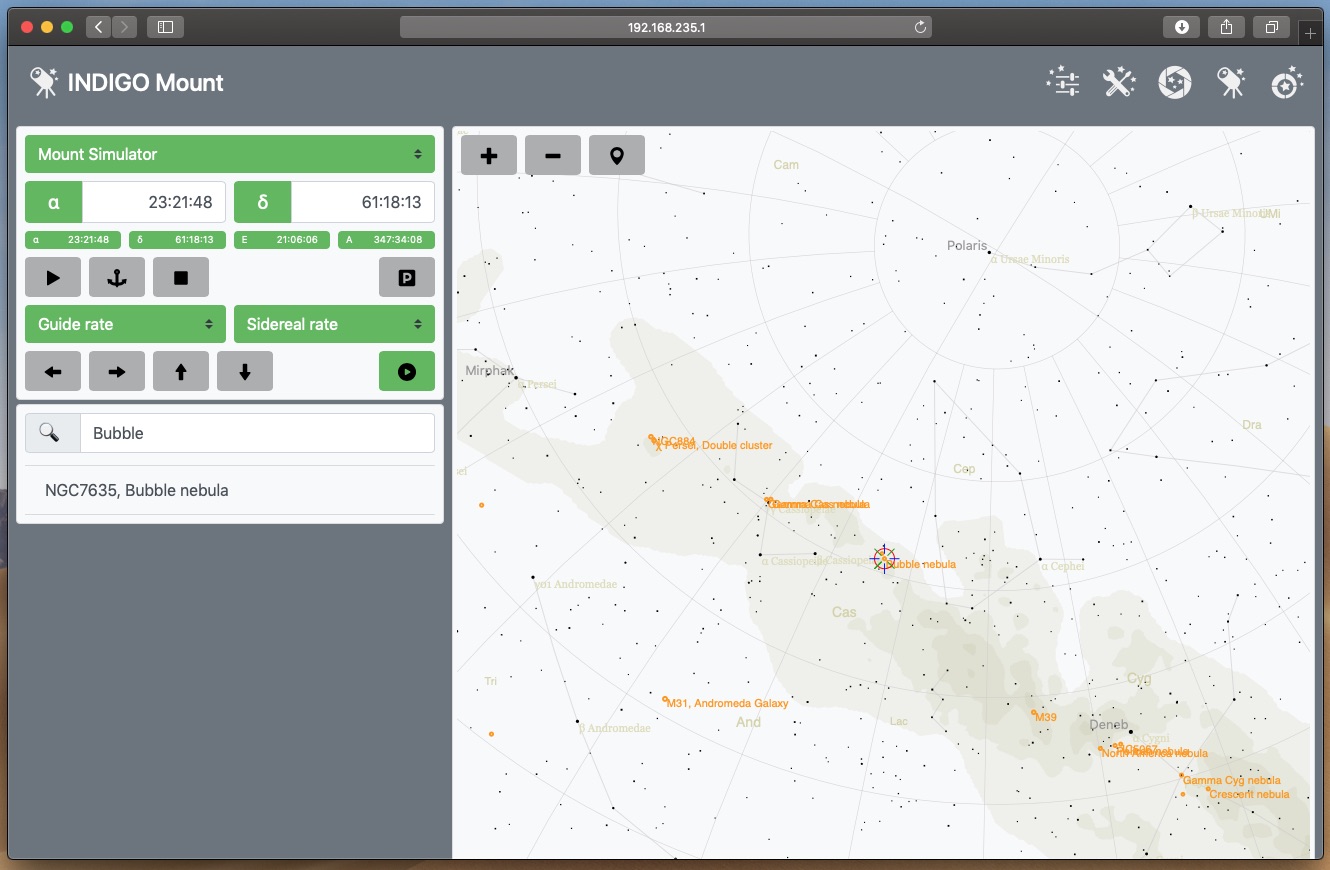
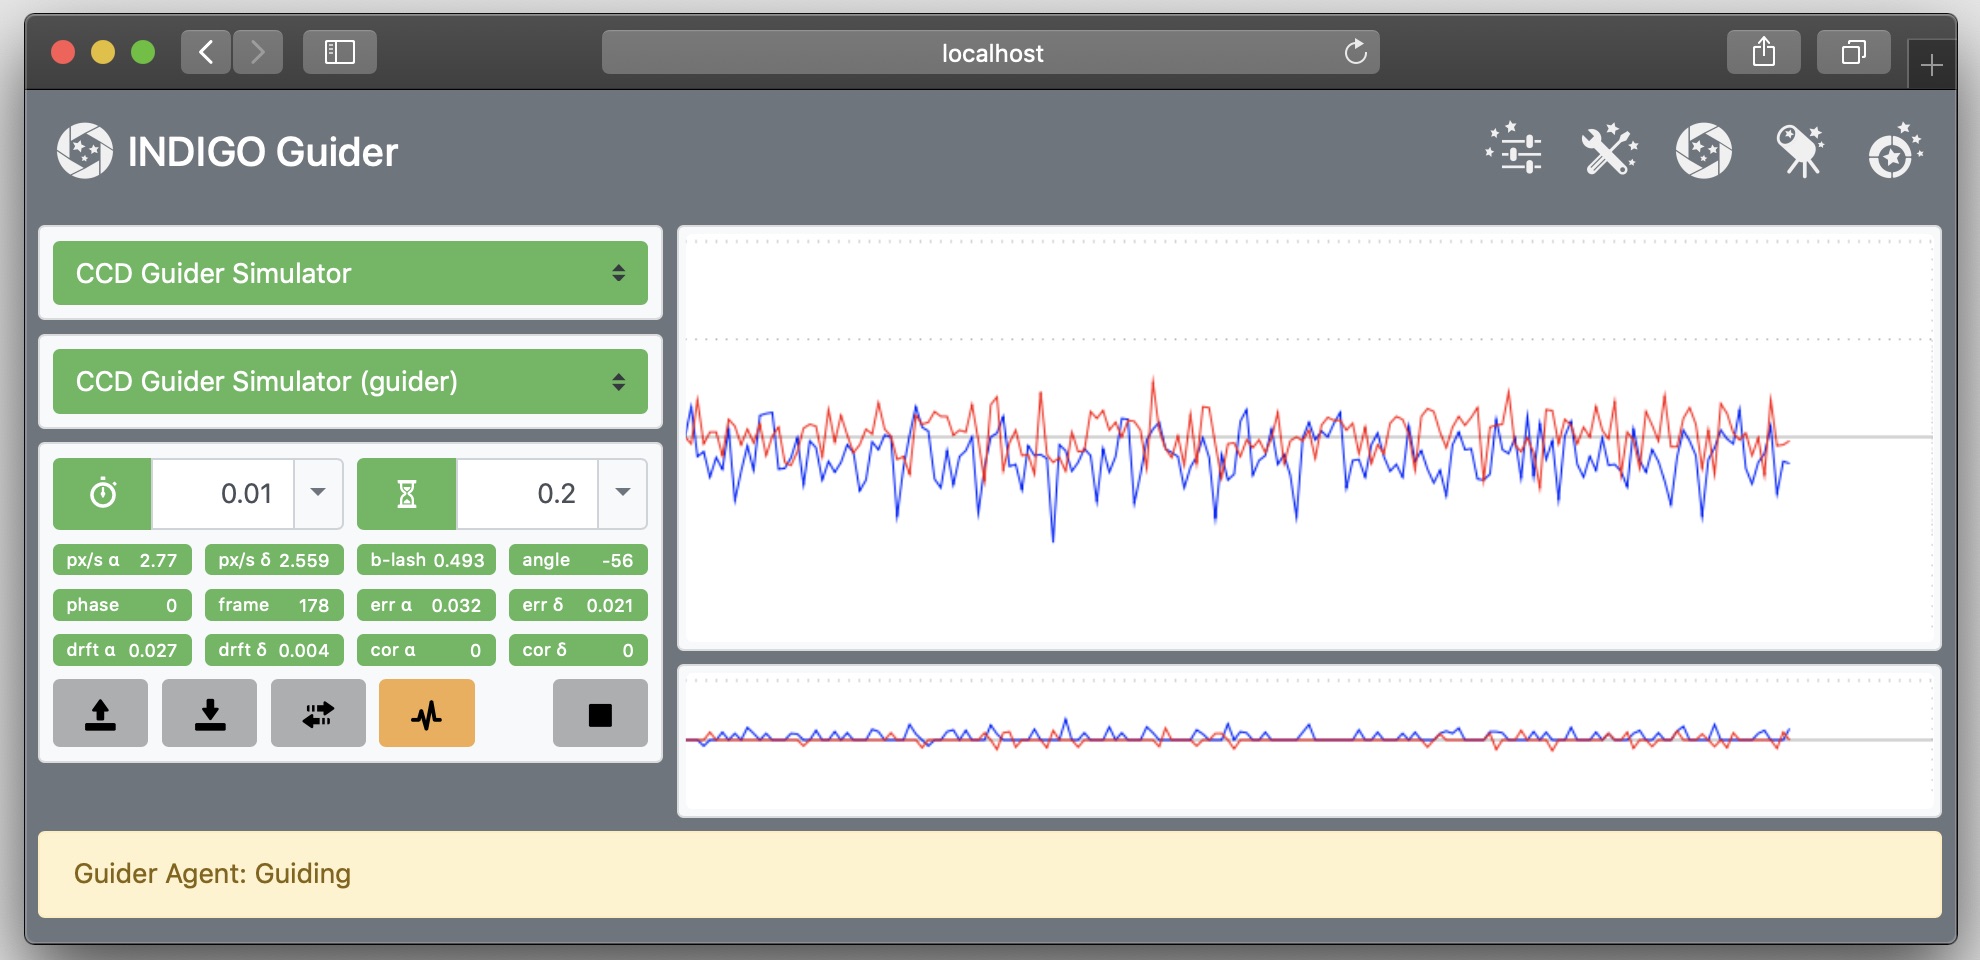
The server can be configured and used with a built-in webGUI providing the basic control of imager, guider and mount agents.
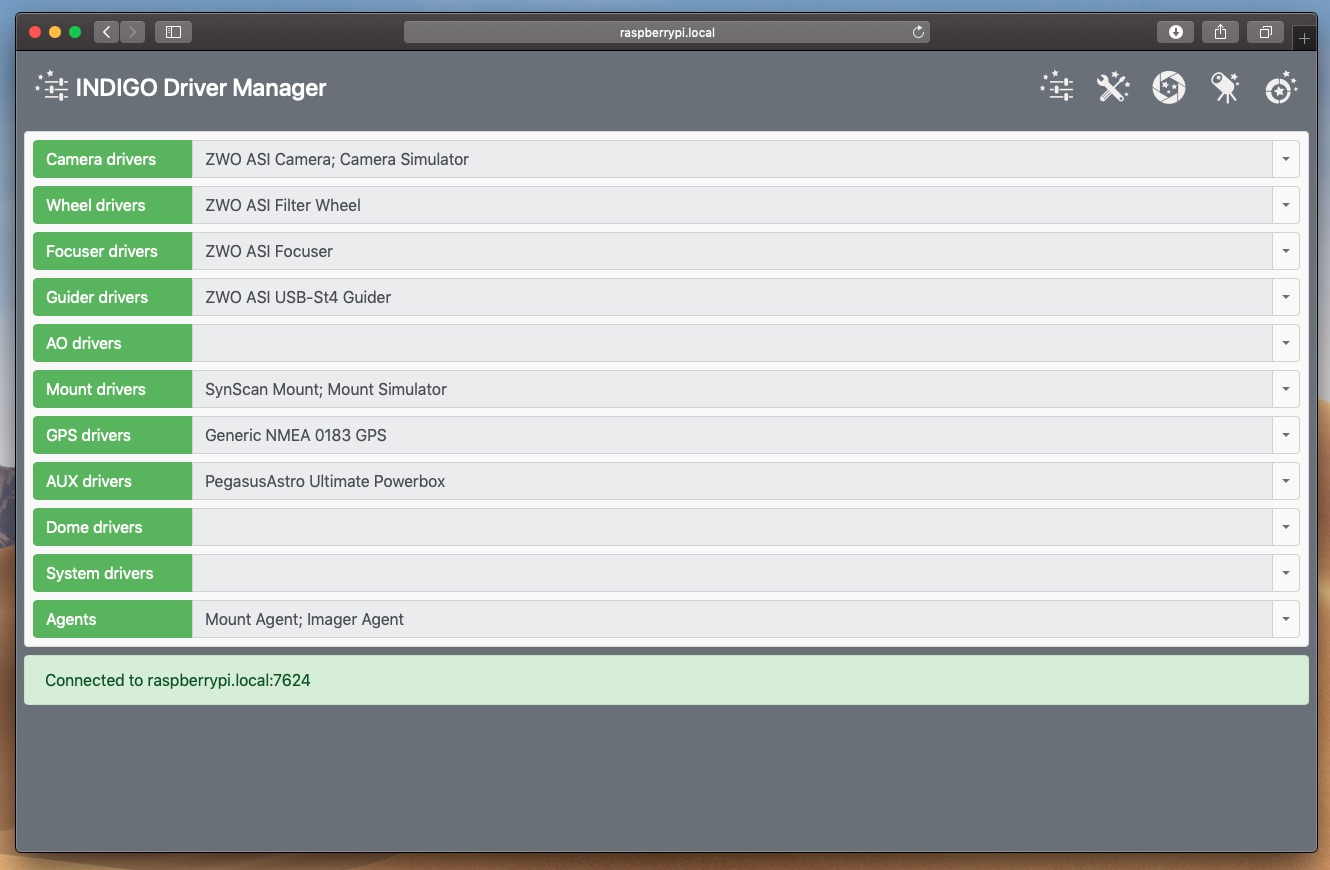
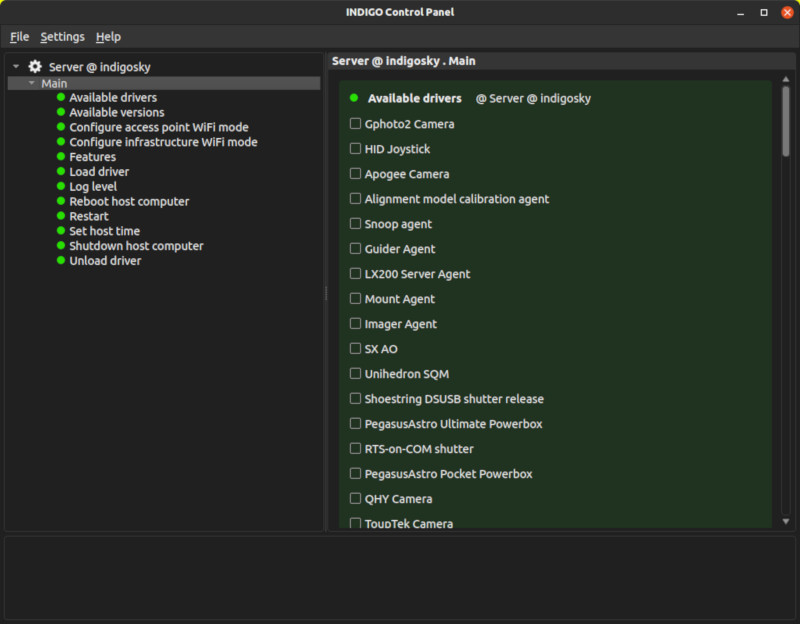
The server can be configured with INDIGO Control Panel (avalilable on our Downloads page). In this case it should automatically detect and connect to INDIGO Sky.
INDIGO Sky has SSH server enabled by default and can be accessed with the following credentials:
username: indigo
password: indigo
NOTE: Windows users need to install SSH client like PuTTY
There are still no native INDIGO clients for mobile devices but we offer a workaround - using a lightweight desktop on the Raspberry Pi which can be accessed using a Remote desktop. This is not the best approach but several similar distributions offer similar solutions. In contrast we do not want to bloat our operating system image and load the tiny Raspberry Pi board with something most users will never need, therefore this is optional.
To enable this option, please login to the INDIGO Sky as descibed above and execute:
$ sudo apt-get update
$ sudo apt-get install indigosky-desktop
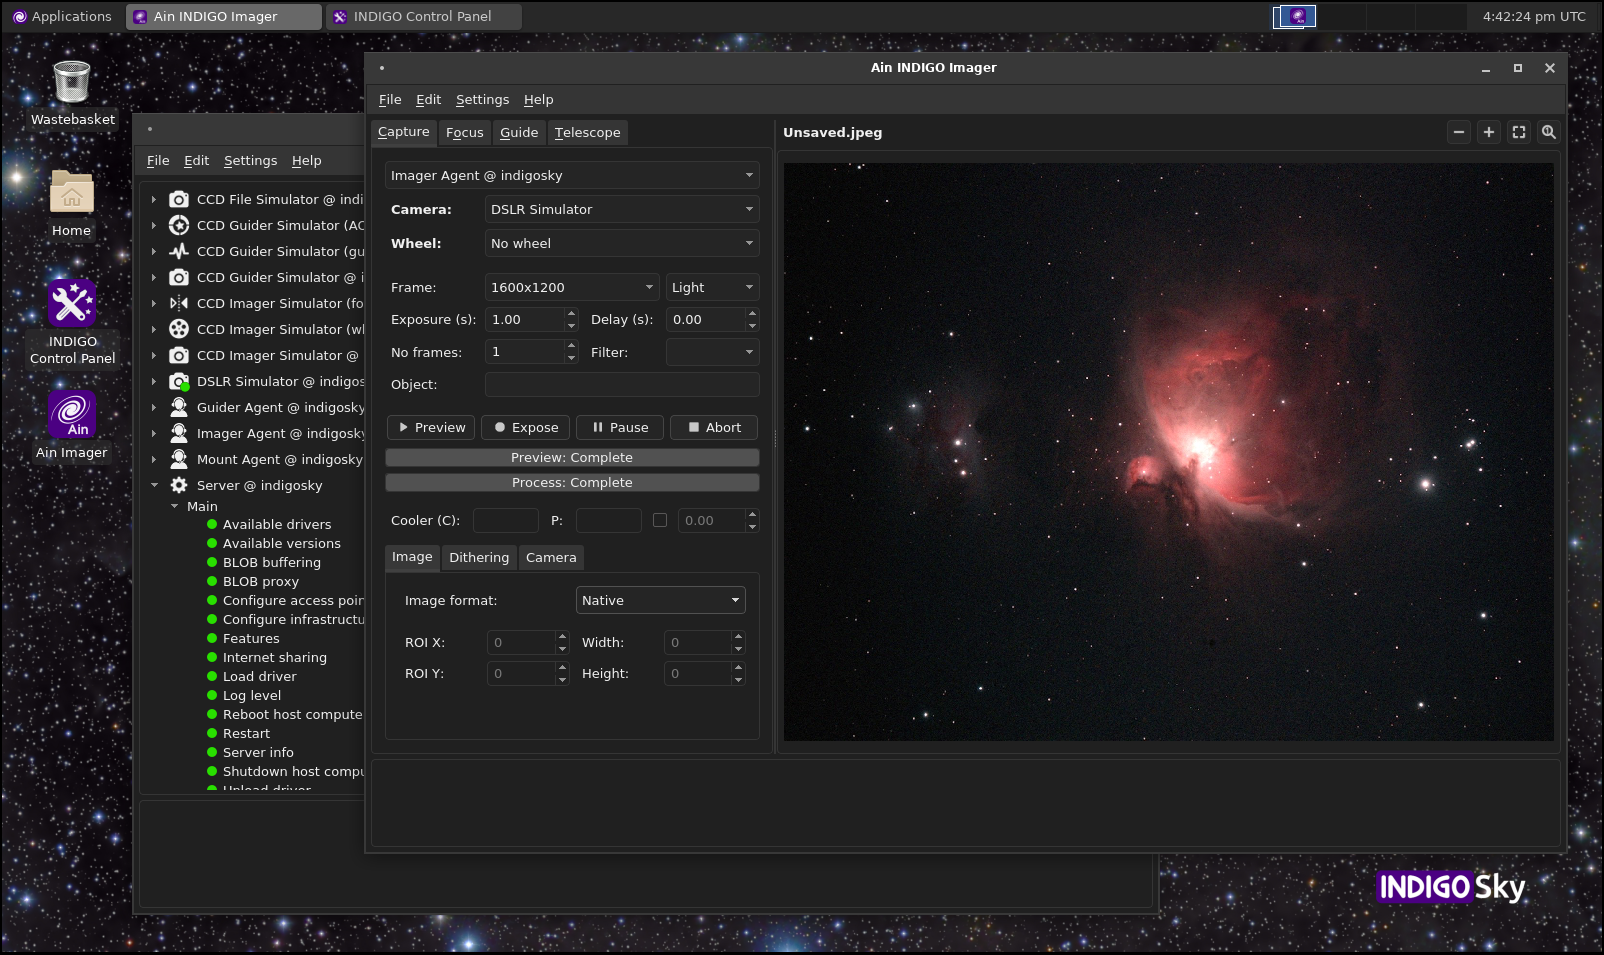
This will install about 1GB of additional software including INDIGO Control Panel and Ain Imager, so it will take some time to complete. When finished you can access your INDIGO Sky box with any VNC client. This is how it looks in action:
The credentials to access the desktop are standard. If your VNC client supports authentication with system credentials (TLSplan) you can access the desktop with the credentials used for SSH and when you change the default password you must use the changed one. If this authentication method is not supported by your client, VncAuth authentication will be used with another passwrd, which also defauts to "indigo". In this case when the system password is changed the VNC password will remain the same. You will have to change it on the console with the command "vncpasswd".
NOTE: With CPU intensive tasks on Raspberry Pi4 you may experience cooling issues. One symptom is the degraded system responsiveness, because the tempearture raised above +80°C and the CPU frequency is being throttled down in order to cool. To avid this issue we highly recommend using a cooling solution. If you are uing the official Pi4 case the Pi4 case fan should work.
To remove the remote desktop access and the related software you should execute the following commands:
$ sudo apt-get remove indigosky-desktop
$ sudo apt-get autoremove
Some drivers may use environment variables to enable certain features. For this the file '/etc/systemd/system/multi-user.target.wants/indigo.service' needs to be edited. Add a line starting with 'Environment=' for each environment variable in the [Service] section. For example, to enable the CFW8A color wheel of the indigo_ccd_sbig driver, execute
$ sudo vi /etc/systemd/system/multi-user.target.wants/indigo.service
and add the line
Environment=SBIG_LEGACY_CFW=CFW8
at the bottom of the [Service] section. After saving the file, restart the INDIGO Sky server.
Please login to the INDIGO Sky as descibed above and execute:
$ indigo_deadlock_detector >indigo_deadlock.txt
This will create a file named 'indigo_deadlock.txt', please send it to indigo@cloudmakers.eu accompanied by a description of the problem and if possible, steps to reproduce it. We need this information to resolve the problem.
For more iformation about the tool please see INDIGO deadlock detector README.
NOTE: INDIGO deadlock detector is available by default in INDIGO Sky 2020-11-01 or newer. If you are running older image please install it:
$ sudo apt-get update
$ sudo apt-get install indigo-deadlock-detector
NOTE: replace x.x.x.x with the real INDIGO Sky IP address. The defult is 192.168.235.1
$ indigo_server -vvv [drivers] >indigo.log 2>&1
NOTE: You may need to specify the full path to INDIGO server. If you ommit drivers it will load the drivers that were loaded last time.